Friday, April 29, 2016

Pink Paper Peonies


We finally finish our coffee filter pink peonies we think they turned out great!

 
We used kool-aid to give them a coral pink shade.
We cut coffee filters like flower shaped snow flakes and wired 8 of them together through the middle. What do you think? 
We will be posting a full tutorial soon!

Wednesday, April 27, 2016

3 DIY Bridal Party Flowers with a Phantom of the Opera theme: #2 Musical Note Boutonniere


Today we are continuing our wedding party flower tutorial series with our music note boutonnieres.
To make this simple boutonniere you need


Supplies and Tools 
                                         
One silk rose bud                               
One silk rose leaf                               
Green floral tape                                  
 Black ribbon
 12 gauge gold aluminum wire
 Hot glue
 Scissors / Glue gun /Needle nose pliers


First trim the stem to about 2 inches  using the wire cutters or needle nose pliers.
                              

Trim any extra leaves off leaving the largest leaf at the top of the stem.


So it looks like this.

Next wrap the stem of the leaf to the stem of the rose so rosebud sits against the widest part of the leaf.
Start wrapping under the rose head pulling lightly so the tape stretches a little wrap down the steam and back up under the rose and tear.


Next wrap the stem with the ribbon start at the bottom glue and wrap over the cut edge and up the stem. Cut the ribbon fold the cut under and glue. Then  glue the ribbon to stem.

To make the music note use your fingers to form the head and stem of the note. Start with the center of the head this will hold the note to the rose.


At the top of the stem use a pair of needle nose pliers (tape the tip of the pliers to prevent them from leaving grooves in the soft wire) to make a small loop to start the flag. After you have made the first loop measure how much wire you need to finish the flag on the note and cut off the excess wire. At the end of the flag make another small loop with the pliers and shape the flag. You can use a template to help get the size and shape you like just shape the note over it and make sure you have a large loop in the middle of the note head.
   

Next bend the loop in the center of the note head so you can slide the rose stem into it. If the loop is to big just squeeze the loop until it stays where you want it.

And your done!
Hope you enjoyed our Music Note Boutonniere tutorial! If you make one of your own leave us a picture or let us know how it turned out!


Next week will finish off our Bridal Party Flower Series with the bride maids bouquet you don't want to miss it! So check out our blog next week!


Tuesday, April 26, 2016


We are sharing our DIY Ice Blue Candy Buffet we did for our facebook page. We used some of our lovely vintage milk glass an assortment of vases and apothecary jars. The letters are old Christmas ornaments. There are sheer curtains and lace in the back ground. We made the crystal chandelier (we will show you how we made this in the next few weeks)  We even made some of the candy you can find the recipes on our facebook page Here


BUTTER MINTS

Sunday, April 17, 2016

Red and Pink, Rose Petal Wedding Aisle Runner!!

Today we are going to share the aisle runner we made for Chris and Jerina's red pink and black wedding!! 

What you need for this wedding aisle runner. 
30" X 25' plain aisle runner or tulle fabric. (We used a plain white aisle runner bought from Walmart)
Silk rose petals 7 red 8 pink 300ct. package (we bought ours at the dollars store.)
1 can of krylon spray adhesive (bought at Michaels)
Hot glue gun and glue sticks.
Optional: 3' curtain rod or dowl.
5'6" ribbon any width.

Work in 2' sections spray  fabric with adhesive. Press petals on to fabric allowing them to over lap covering the fabric. Use one color for the first 4 feet then start adding the 2nd color. We did the first four feet on both sides first and filled in the middle. Loose petals and petals that were overlapping several others were hot glued in place.
When you have finished gluing the petals on. Roll the curtain rod or dowl up in the aisle runnerpetals on the inside.
Tie a slip knot on both ends of the ribbon. Slip ribbon on either side of the curtain rod and tighten just enough for it to glide when it is rolled out.


Monday, April 11, 2016

3 DIY Bridal Party Flowers with a Phantom of the Opera theme: #1 The Bridal Bouquet

Masquerade Wedding Bouquet


     Welcome to our blog we are so happy you found us. This is our first post so I thought we would introduce ourselves. My name is Naomi Letcher and my daughter and partner in craft is Sierra. Together we make up Enchanting Event Design llc. Here on our blog we will share our adventures in the wonderful world of weddings and how we DIY our way though it.
    Now as the title promised here here is our 1st of 3 bridal party flowers from the wedding we are currently working on with a fantastic Phantom of the Opera theme. Britaney (the bride) chose a classic, round, hand-tied, bouquet.

What you will need

8 large half open red silk roses
5 large slightly wilted, dark red cabbage roses
8 large black rose buds (we used open roses and took off the two outer rows of petals)
Floral tape to match stems
Gold trim or cording
Gold mask
1” wide double faced black satin ribbon
Gold wire

Tools

Wire cutters
Scissors      


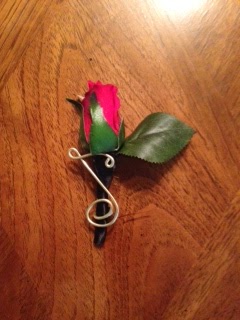
     The black roses had black stems so we switched them out with the excess we cut off the red roses. We trimmed the black stems to about 2 inches using floral tape we wrapped the two stems together. Starting under the rose head down to just below the black stem and back up to the rose. We did this to keep a more uniform and natural look of a hand tied bouquet.
    You can find the tutorial we used to make the shape of the bouquet Here.  (http://www.bridecraft.com/rose-wedding-bouquets)
 
    To accent the roses we cut the corsage pins to about 1” and hot glued them into the center of the red roses so they sit just above the inside petals.
    The mask we placed off to the side and wired it to the bouquet though the holes on each side of the mask and attached it under the head of a rose underneath the holes. Then we attached the trim to one side of the mask and looped it around the top of the bouquet and glued under one or to of the  petals to help keep it in place then attached to the other side of the mask. Our bride loved the way it came together and so did we! Hope you enjoyed our first post. Come back next week and we will show you how we made the boutonnieres for the groomsmen! We will have step by step pictures for these.


Let us know what you thought in our comments we would love to hear from you!